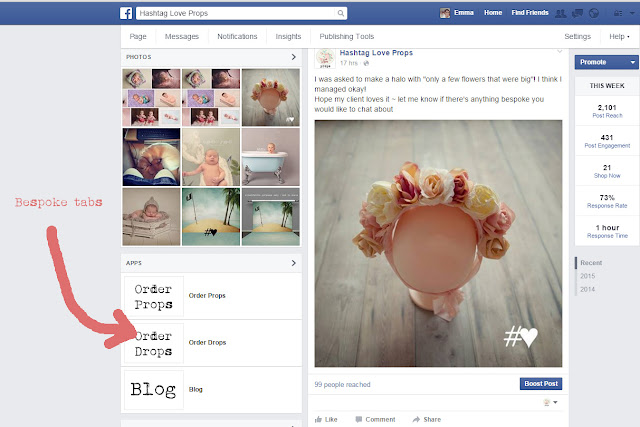
If you look at my Facebook business page, you will see that I have some tabs I have personalised and added to help make it easier for vistors to find things and navigate.
Vistors can find links to my external websites on the side of my page
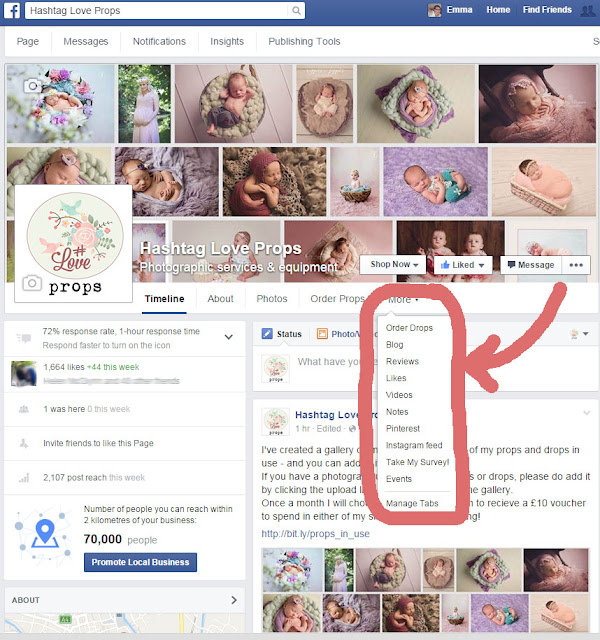
Or by clicking the "more" link under my cover photo
In this tutorial, I show you how I made my own generic tabs.
Before we go any further - this is one of the longest tutorials I've written to date, and at first sight you might think "gulp - this looks complicated!"
But it's really not, there are just a lot of steps you have to do and the end result is worth it.
INSTALLING YOUR FIRST TAB
Step 1
Create a free account with Woobox
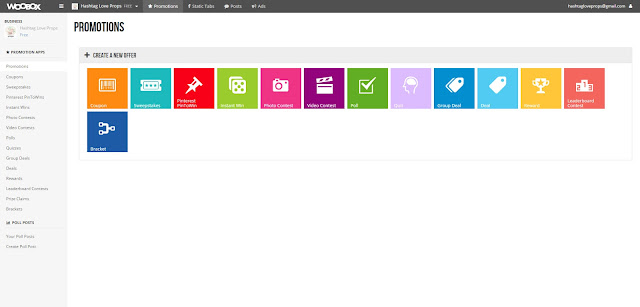
Once you have registered you should see a dashboard similar to this
Woobox is a great platform for hosting giveaways, competitions and polls legally within Facebook's ever changing policies. So many times I see a page asking their visitors to like and share an image to be entered into a competition. Did you know (at the time of writing) that it is against Facebook rules to ask people to share? Facebook can (and have) shut down business pages with no explanation for not sticking to their rules. So it's worth looking at the features Woobox offers.
But for now, we're going to go back to Facebook.
Step 2
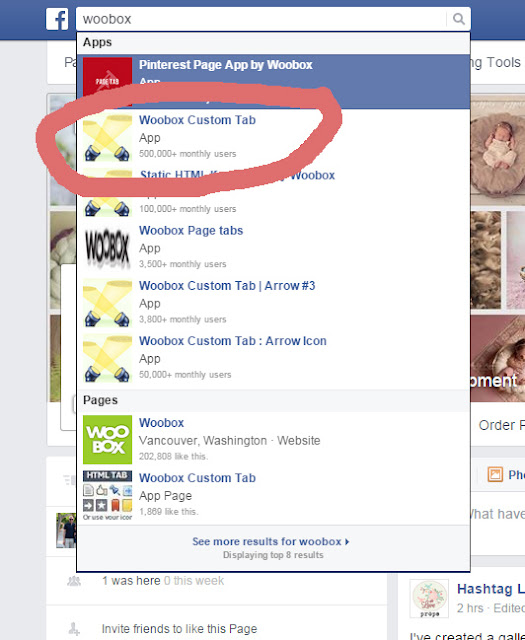
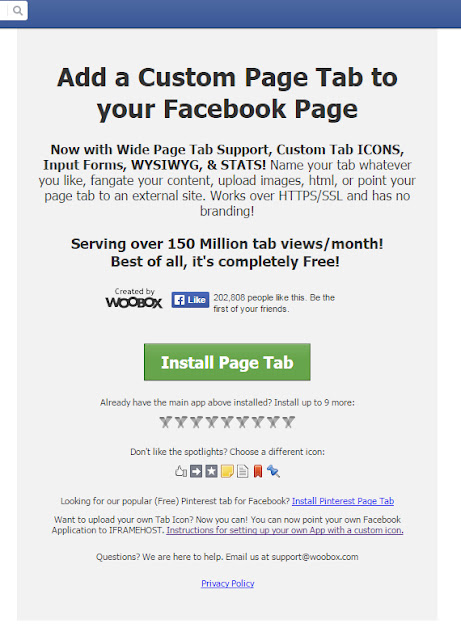
Search for Woobox in the Facebook search facility - click the Woobox Custom Tab app option
Press the big green button!
Step 3
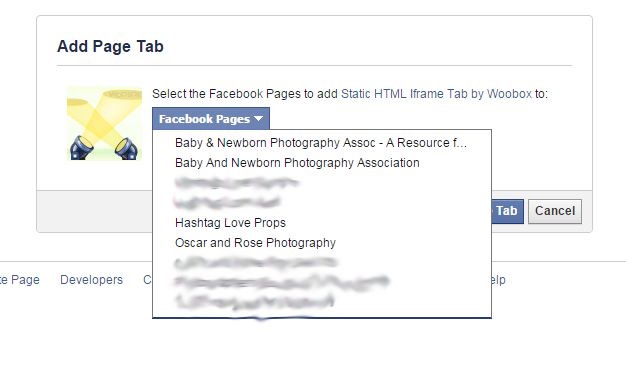
If this is the first time you have installed a Woobox Page tab, you should be asked which page you want to add it to (yes, I run a few pages!)
If you have already installed a Woobox tab and now want to add a second or third - skip ahead to the instructions for adding more tabs below
Choose your page and then hit the blue button that has been obscured by the pop-up box! (Install Tab)
Step 4
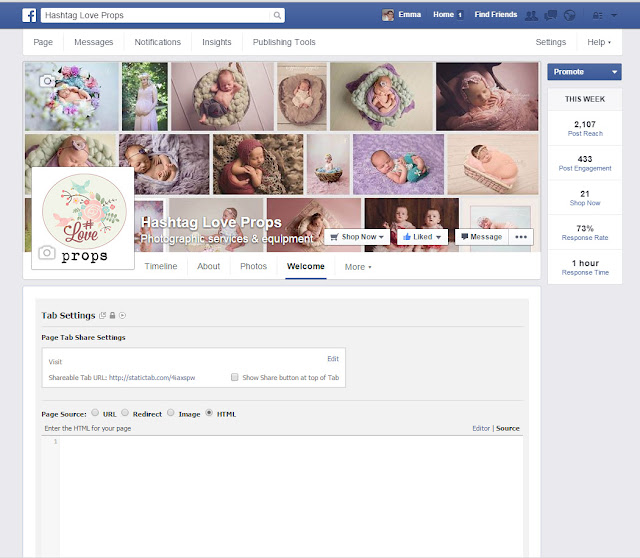
The app will then take you to the settings part of your page
Let's look at the options
You have two options about what happens when your visitor clicks the tab
1) It opens up a new window and takes them to a new website (your blog for instance)
2) It displays a web page without leaving facebook
You can also create your own tab image using the pixel dimensions given to you - it's very small so keep the design simple and clear.
Step 5
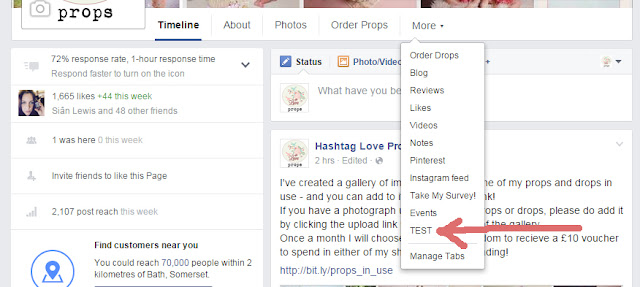
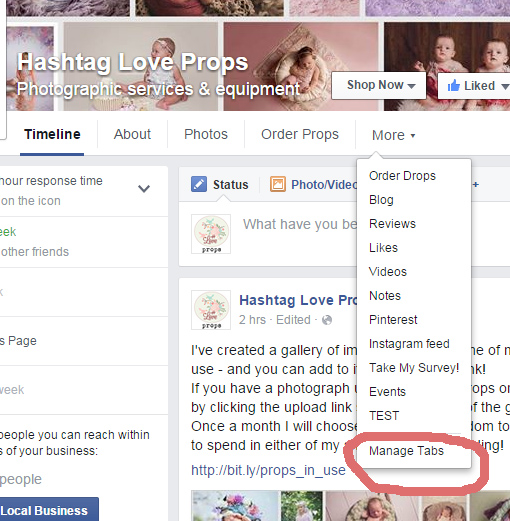
Now go back to your page - you may see your new tab name under your cover photo (where I've circled). If not, click the "more" option
I called my newly created tab "TEST" for this tutorial and you can see it in my drop-down menu.
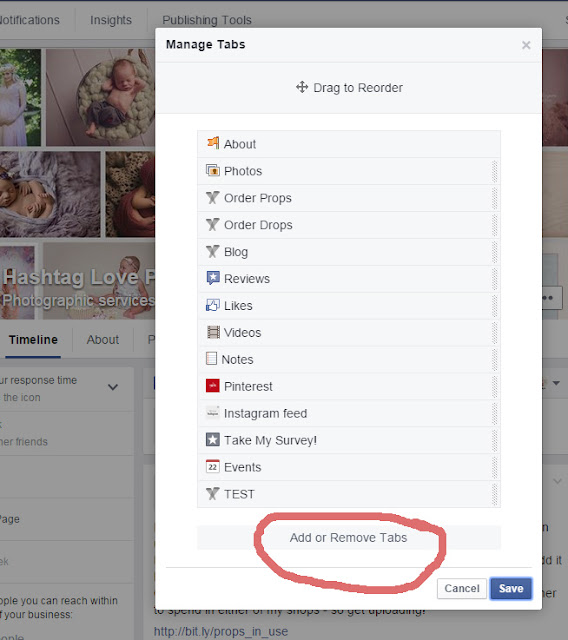
If you click "Manage Tabs" you can move your tab up or down in order of importance. I want people to notice my "Order Props" tab first, then the link to my backdrop website, then my blog etc.
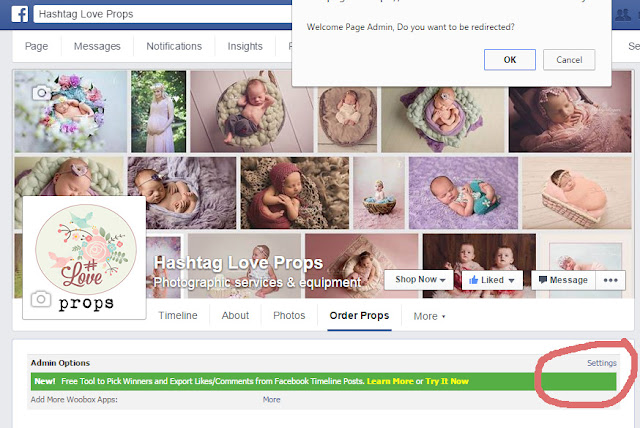
Because you are the administrator for both your page and your Woobox account, whenever you click on the tabs, you will be taken to the admin area of the tab, rather than seeing it work like your visitors would.
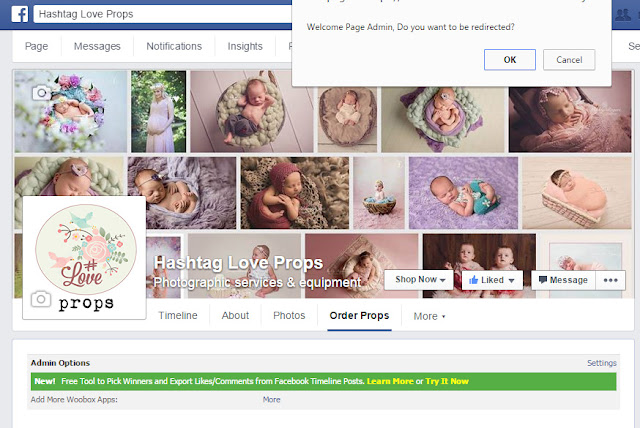
If I click my "Order Props" tab on my page, I get to see this as the administrator.
Click OK
The tab should then take you to whatever you have set up (either a new website, or your contact form etc)
EDITING YOUR TAB
If you want to change this tab at any point in the future (your prices change, you want to show a different web page, you want to change the tab text etc) click cancel and then click the settings option
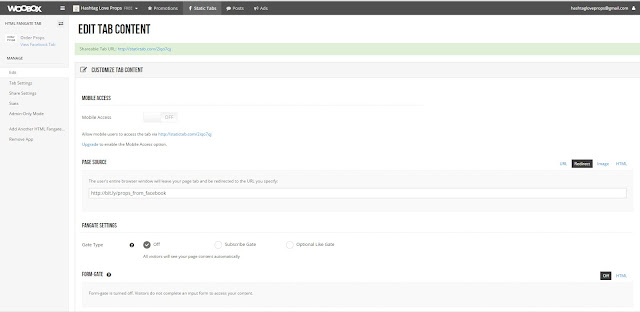
This will take you to your Woobox account where all the information for each tab is saved.
You then have the same options from when you first created your tab in the sidebar
You can change the URL destination or change the tab name, icon etc
DELETE YOUR TAB
If you're running a giveaway, you need to delete the tab from your page once the contest is over
From your facebook page, click "more" and "Manage Tabs"
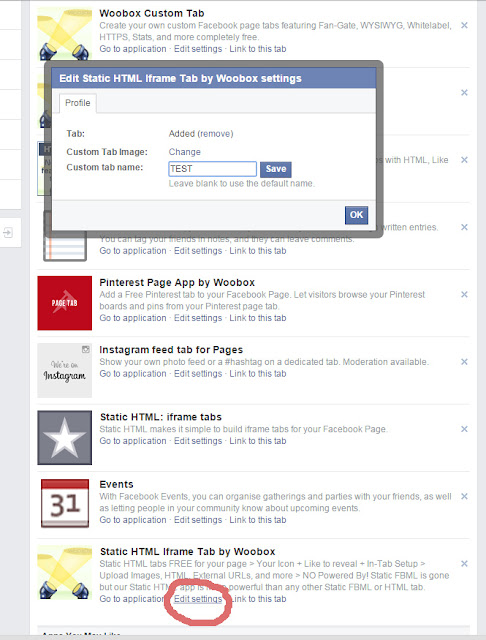
If, like me, you have more than one tab installed, it's not easy to know which Woobox tab it is you need to delete
Click the "Edit settings" option and a pop-up box will show you which tab you have selected.
ADDING MORE TABS
Search for Woobox in the Facebook search facility - click the Woobox Custom Tab app option
Press the big green button!
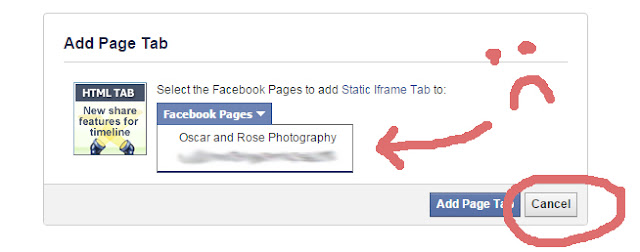
Unlike when we installed our first tab, this time it hasn't shown me all of my Facebook pages
Click cancel and you should see this
Yay! You can now install another 9 tabs to your page if you want! You just have to click cancel each time it asks which page you want to install to. (No, I don't know why!)
Just follow the exact same steps for when you installed your first tab.
I hope you find this tutorial useful (if not a bit long!) and would love to see how you apply your own tabs to your page - leave a comment below with a link to your page!










No comments:
Post a Comment